Enhance management efficiency with a simple integration
Integrating HRnest with the Slack platform is not only about efficiency but also full control over personnel management processes.
Accepting leave requests and time tracking are streamlined. Viewing the stage of the request acceptance process, as well as absentees and remote workers, is available directly from Slack. Additionally, you receive notifications about all changes directly in the messenger.
Access to various integration features depends on the permissions granted to the employee by the HR Department. This ensures everyone has access only to what they really need and fits their role in the company. It not only facilitates work but also ensures that important processes are safe and conducted in accordance with the company structure.
Just enter the right command and utilize the features without logging into the system!
Slack is a very clear and intuitive tool. After clicking on HRnest, we find 3 tabs:
Home
In Home, we find a description of the features available in Slack.
Messages
In Messages, we find a messenger for sending commands and receiving system messages from the HRnest bot.
About
In About, we find commands that activate actions also available in the HRnest system.
To activate the action on Slack, just send a message with the appropriate command. Currently, there are 3 possibilities:
/absentlist
List of absentees in the next 7 days
/workingremote
List of people working remotely in the next 7 days
/tracktime
Employee's time tracking
Now, in the Slack app, you have the ability to approve and reject all types of leave requests. Additionally, you can easily track the statuses of these requests. Making the whole process more transparent.
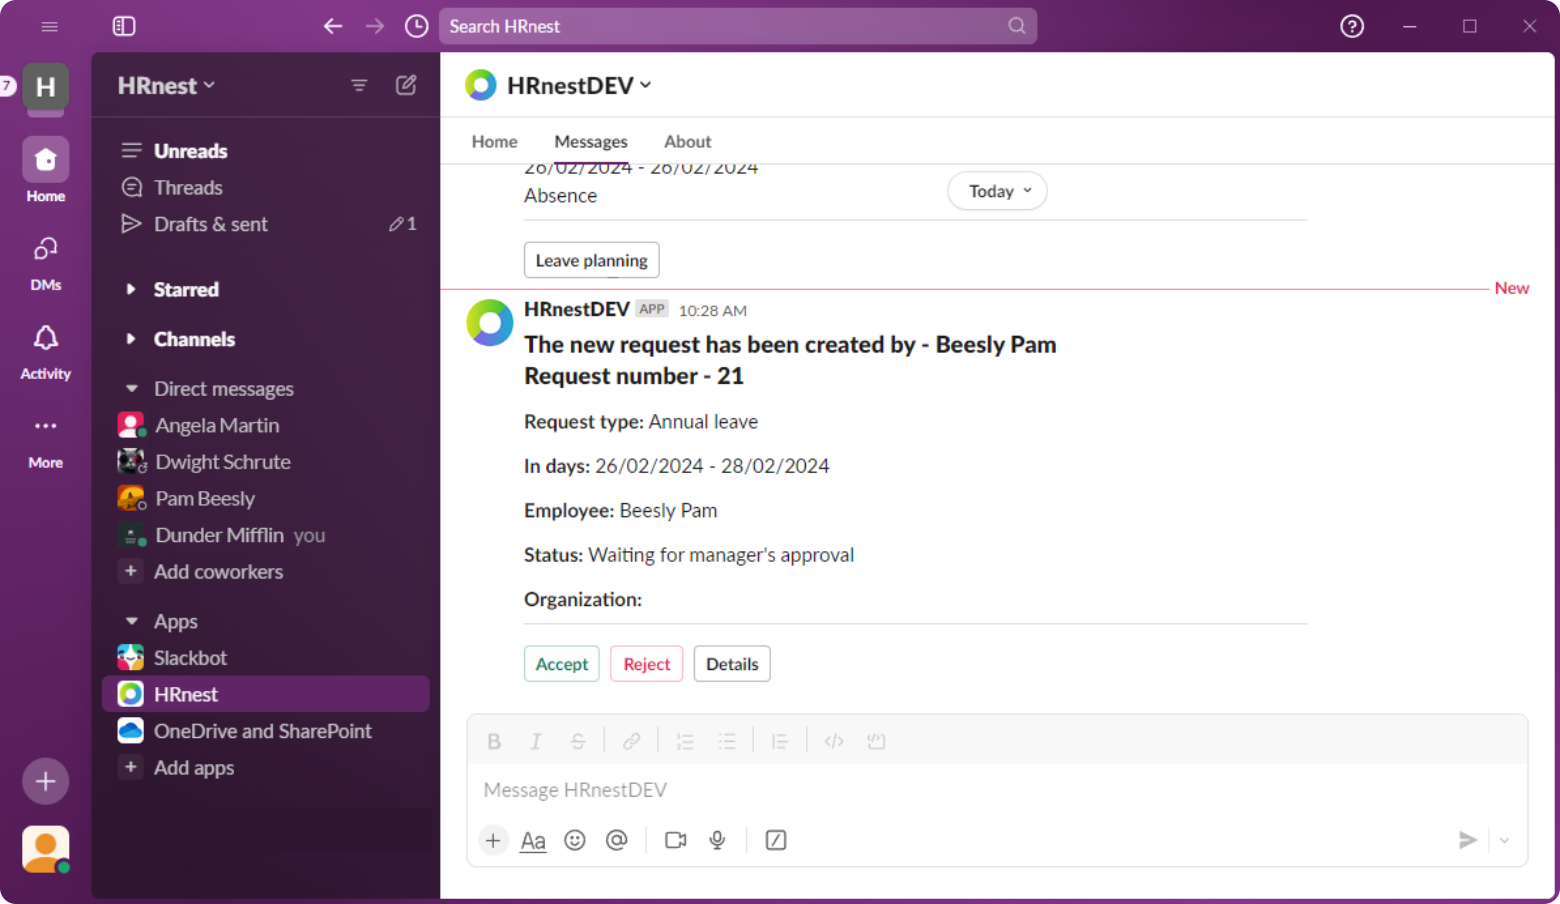
When a request is submitted, the person responsible for its review receives a notification. On Slack, a message displays information about the submitted request and 3 actions for the supervisor to choose from:
Action buttons allow for direct review of the request or inspection of its details. Upon decision-making, additional notifications are sent to involved people.
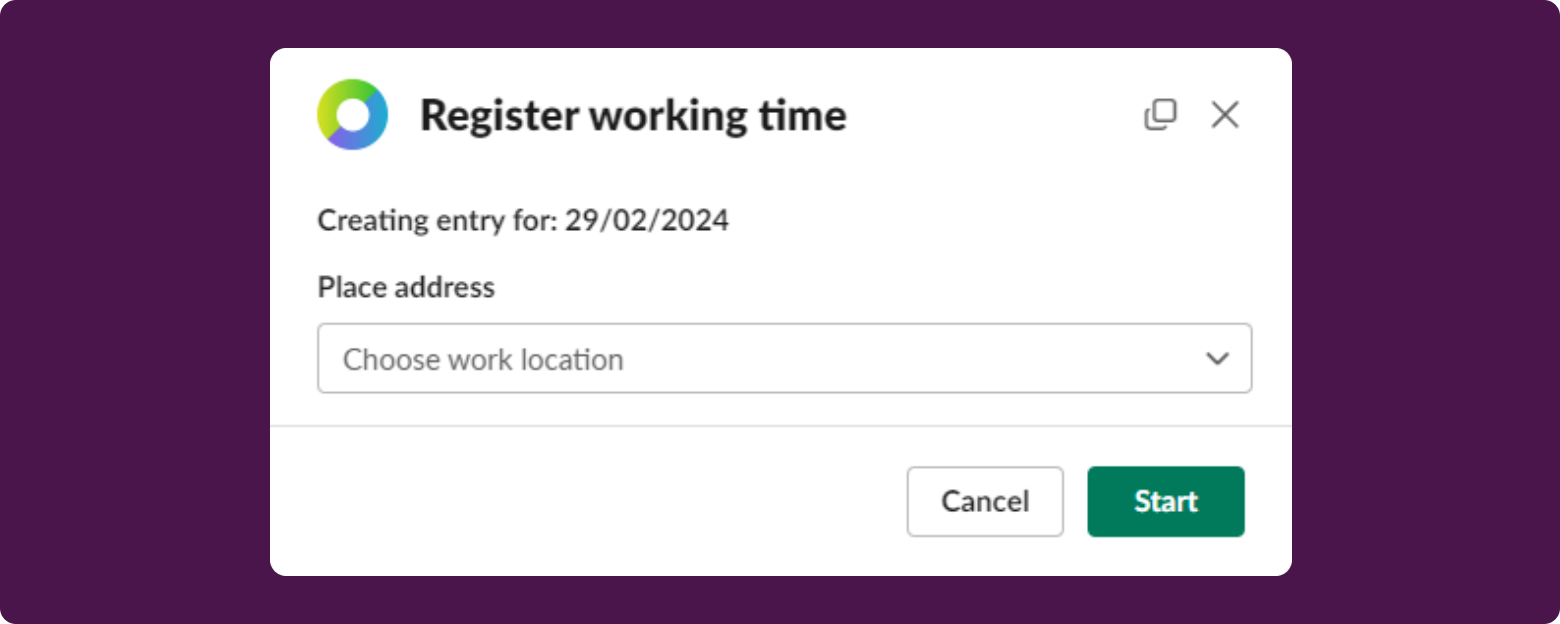
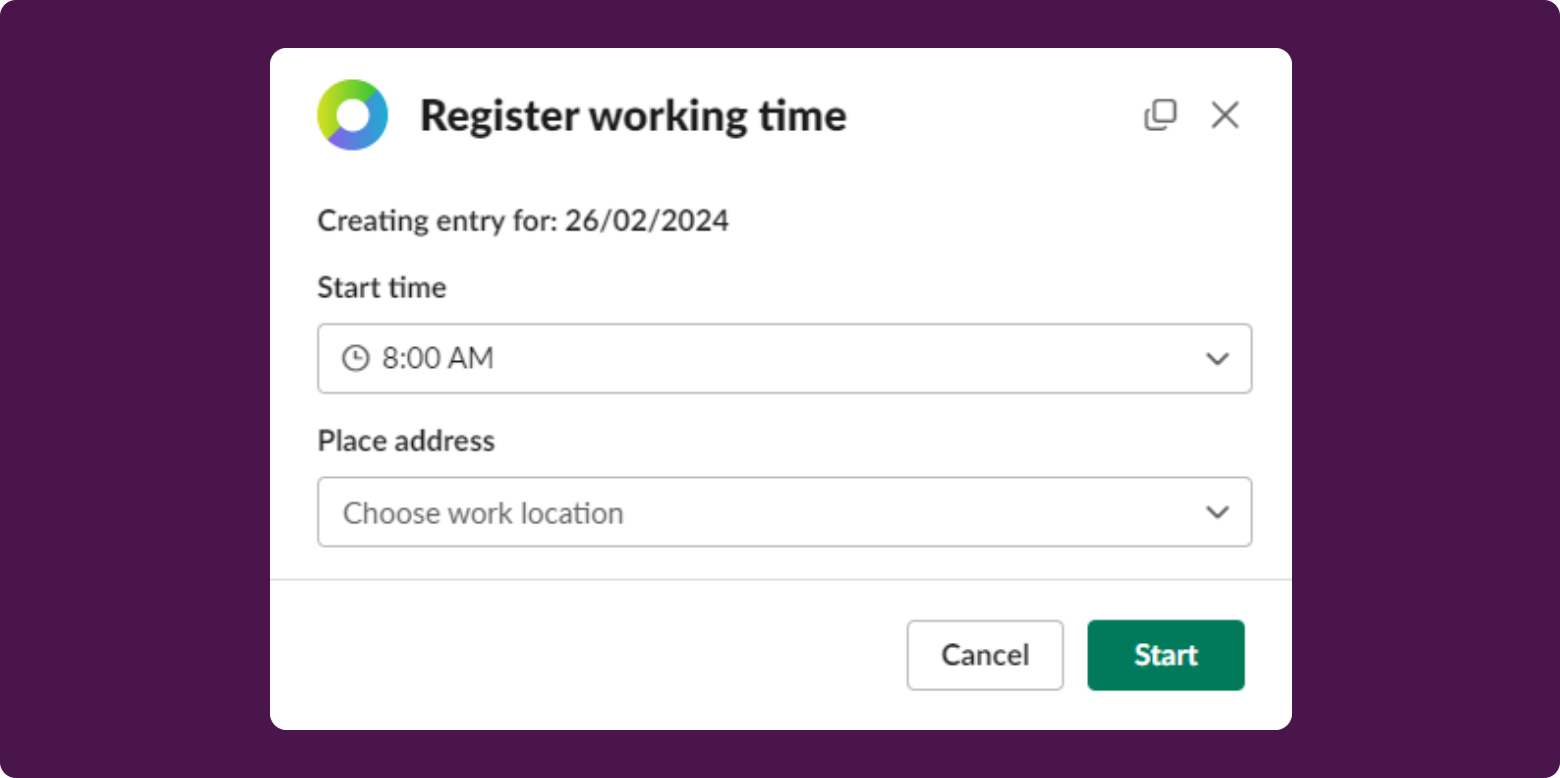
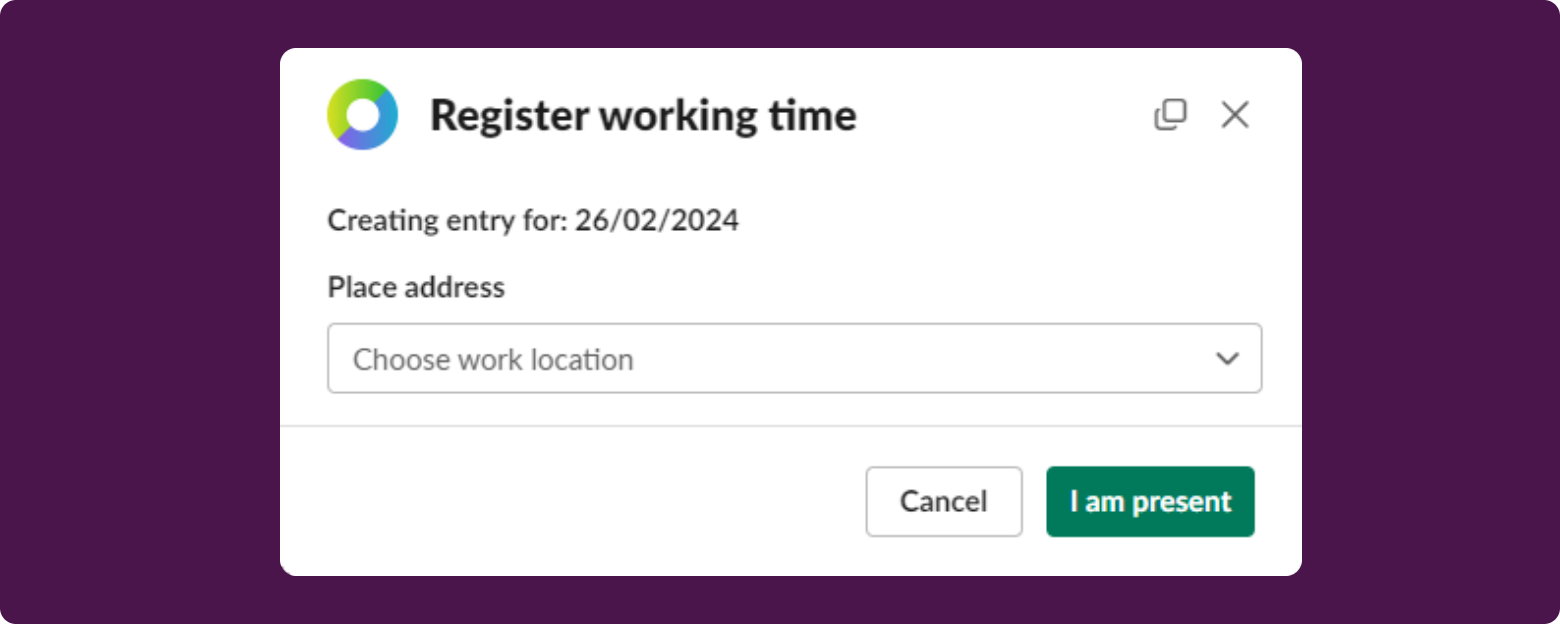
The integration also allows for time tracking. Employees don’t even need to log into the HRnest system to fill in the necessary data. After entering the command /tracktime, you can register work time or presence.
Slack reflects the registration method set in the system. 3 registration methods that work in the Slack app are:
Start/stop system
Indicating hours
Indicating presence
Registrations differ depending on the chosen method, but each is very clear and intuitive. An additional function is the ability to enter a comment and mark the workplace.
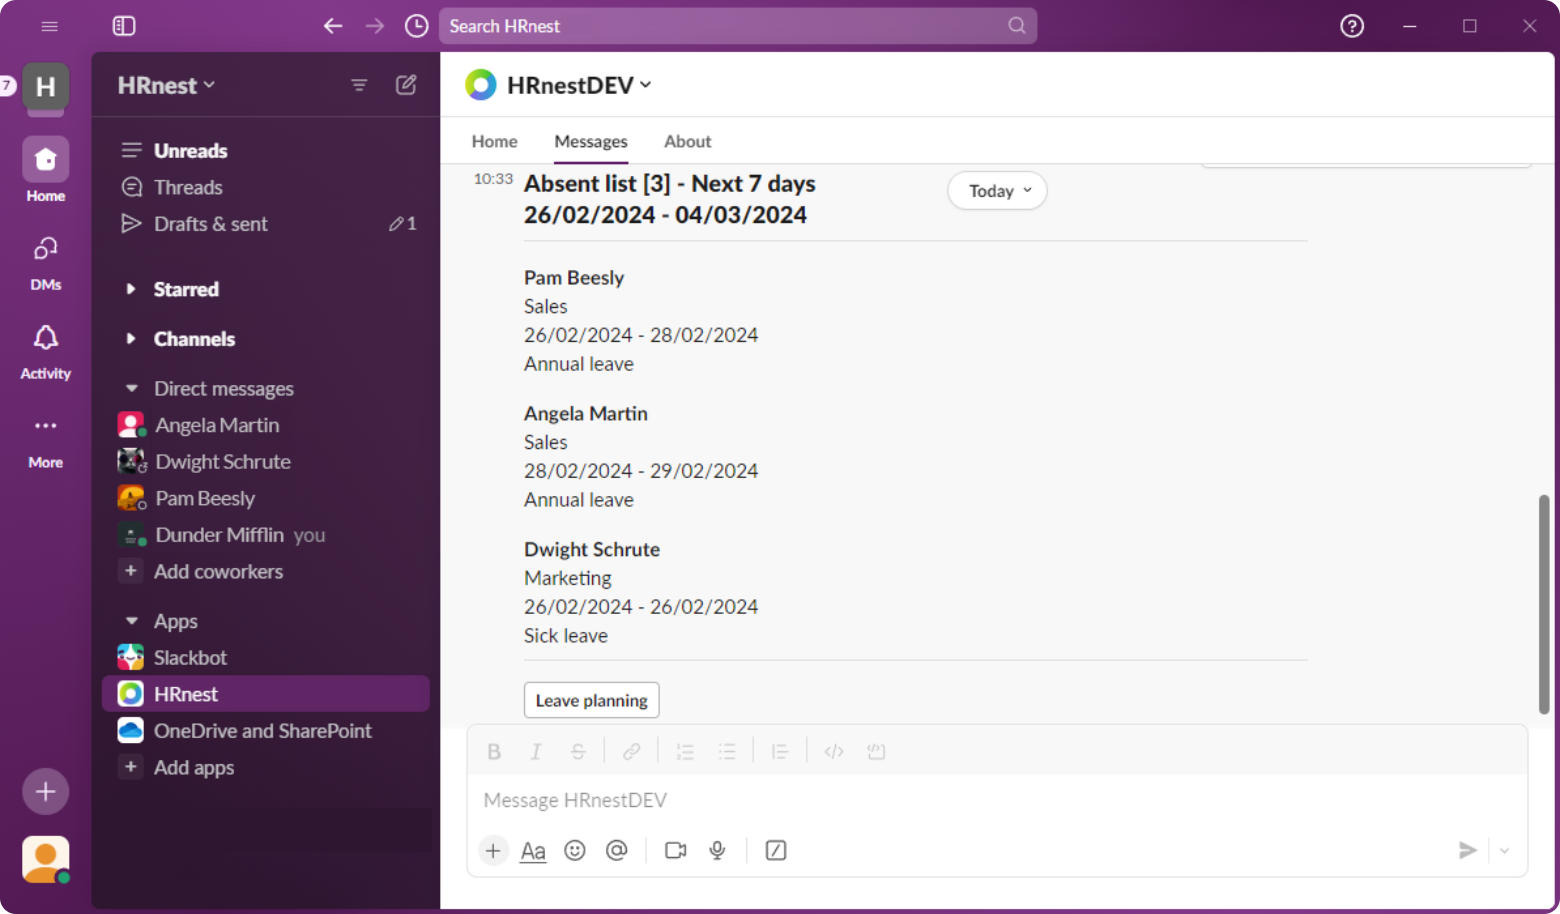
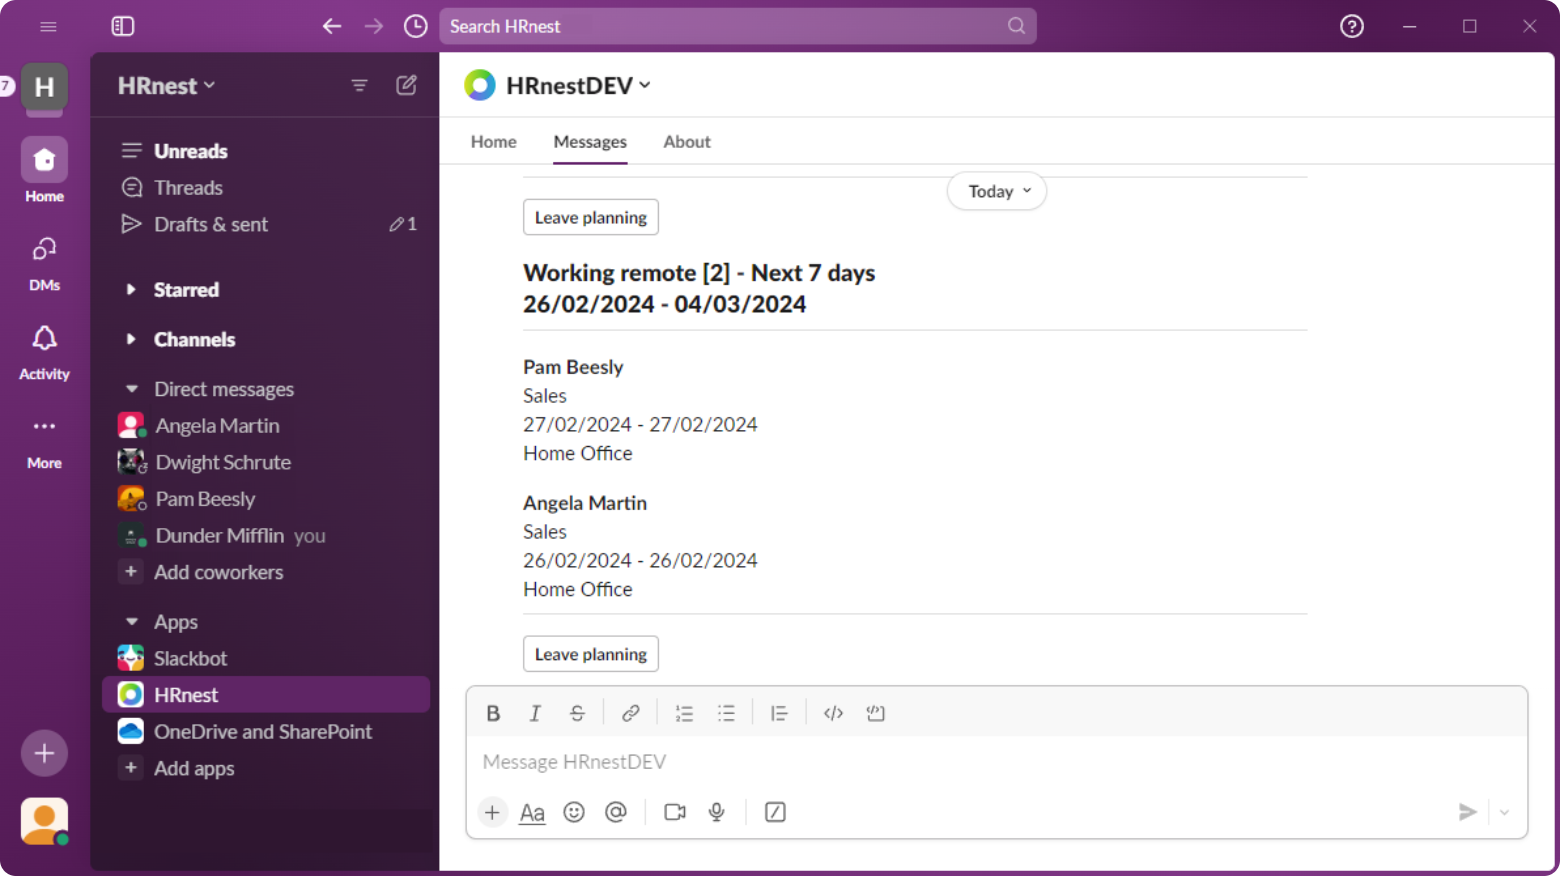
In the Slack messenger, you can also view the list of absentees and remote workers, which helps in task planning and team management. On Slack, by entering and sending the command /absentlist, you can view absentees, and by entering /workingremote, you can view remote workers. This corresponds to the Next 7 Days section in the system.
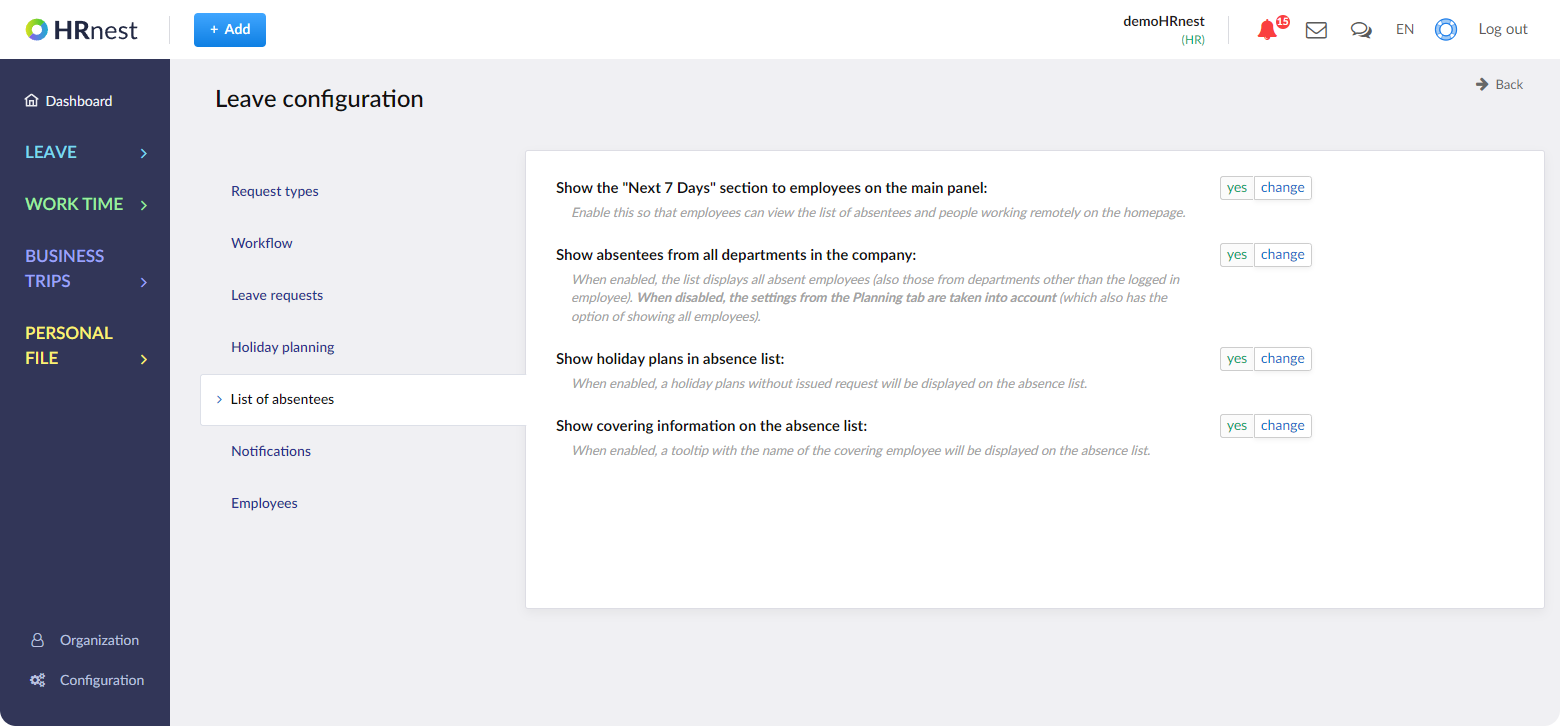
Being logged into the HR Department account, you can set preferences regarding the ability to view the department or other employees.
Go to Configuration, and then in the Leave tab, choose the Absentee List option.
The list appearing on Slack matches the options selected in the system.
The Calendar button at the end leads directly to the Calendar in Leaves.
Thanks to automatic notifications, you won’t miss important deadlines or changes in HR processes, making the entire personnel management process more efficient and transparent. All team members are kept up to date on significant events and recent changes.
Automatic notifications also allow for quick response to sudden modifications, affecting the flexibility and efficiency of the team. Receiving important information directly on Slack eliminates the need to constantly check emails or log into the system.
This convenience of using automatic notifications helps HR teams and employees maintain consistency and clarity in communication. Leading to more efficient personnel management and increased productivity of the entire organization.
Message content and data can be displayed in 2 languages: Polish or English. The language that is set in the HRnest system also works in the Slack app. Commands activating action on Slack work only in English. All commands can also be found in the About tab.
This feature reflects the permissions set in the system. To configure the visibility of the next 7 days for employees, you need to access the configuration from the HR Department account. In the Leave module, choose the List of Absentees and change the settings according to your own preferences.
Log into your account and go to the Configuration, which is located at the bottom, in the left menu. In the Slack Integration tab, click the Turn off button.

Wypróbuj HRnest za darmo
Zarejstruj się i testuj nasz system przez 30 dni bez zobowiązań!
Try HRnest for free
Register and test our system for 14 days without obligation!
Get acquainted with the help materials:

This website uses cookies so that we can provide you with the best possible service. Cookie information is stored in your browser and performs functions such as recognizing you when you return to our website and helping our team to understand which sections of the website you find most interesting and useful.
Necessary cookies should always be enabled so that we can save your cookie settings preferences.
| Cookie | Domain | Description | Duration | Type |
|---|---|---|---|---|
| elementor | hrnest.com | This cookie is used by the website's WordPress theme. It allows the website owner to implement or change website content in real time. | always | Necessary |
| moove_gdpr_popup | hrnest.com | This cookie is used to remember your choices regarding cookie settings. | 1 year | Necessary |
Enabling these cookies helps us improve our website.
| Cookie | Domain | Description | Duration | Type |
|---|---|---|---|---|
| _gcl_au | hrnest.com | Statistical and marketing Provided by Google Tag Manager to experiment with the advertising performance of sites using their services.e cookies | 3 months | Statistics |
| test_cookie | doubleclick.net | The test_cookie file is set by doubleclick.net and is used to determine whether the user's browser supports cookies. | 15 minutes | Marketing |
| _ga | hrnest.com | The _ga cookie, installed by Google Analytics, calculates visitor, session and campaign data and tracks site usage for site analytics reporting. The cookie stores information anonymously and assigns a randomly generated number to recognize unique visitors. | 14 months | Statistics |
| _gid | hrnest.com | The _gid cookie installed by Google Analytics stores information about how visitors use the website, while also creating an analytical report on the website's performance. Some of the data collected includes the number of visitors, their source, and the pages they visit anonymously. | 1 day | Statistics |
| _gat_UA-{id} | hrnest.com | A variation of the _gat cookie set by Google Analytics and Google Tag Manager to enable website owners to track visitor behavior and measure site performance. The pattern element in the name contains the unique identification number of the account or website to which it refers. | 1 minute | Statistics |
| _ga_{id} | hrnest.com | This cookie is installed by Google Analytics. | 2 years | Statistics |
| _fbp | hrnest.com | This cookie is set by Facebook in order to display advertisements on Facebook or on a digital platform supported by Facebook Ads, after you have visited the website. | 3 months | Marketing |
| _clck | hrnest.com | It retains the user ID and Clarity preferences, unique to this website and assigned to the same user ID. | 1 year | Statistical |
| _clsk | hrnest.com | It combines multiple page views of the user into a single Clarity session recording. | 1 day | Statistical |
| _uetsid | hrnest.com | It contains the session identifier for a unique session on the website. Note: Since July 2023, _uetsid has been updated with additional parameters as follows: Insights_sessionId, timestamp, page number, refresh, submit. | 1 day | Marketing |
| _uetvid | hrnest.com | UET assigns this unique, anonymous guest identifier representing a unique guest. UET stores this data in its own cookie file. Note: Since July 2023, _uetvid has been updated with additional parameters as follows: Insights_userId, cookieVersion, expiration time, consent, cookie creation time. | One year rounded to the nearest full month | Marketing |
Please enable Strictly Necessary Cookies first so that we can save your preferences!